Table of contents Show
The Czech Easter eggs are an excellent reason to visit the country or even its capital, Prague. We’re not referring to cooked, scrambled, neither omelet, nor poached eggs but the stunning traditional Czech Easter eggs sold as year-round masterpieces of Czech arts.
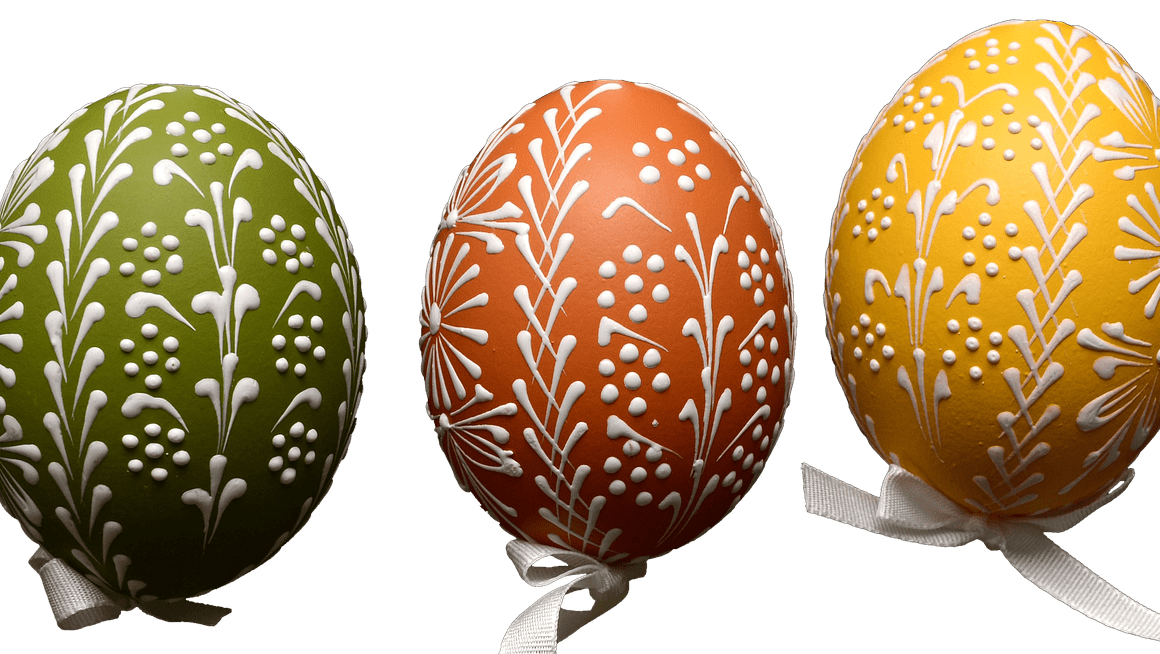
Kraslice, Czech Easter eggs, are beautifully decorated traditional eggs that hold cultural significance during the Easter season in the Czech Republic, while the tradition of “whipping girls” involves lightly playfully whipping Czech girls with willow branches on Easter Monday as a symbol of health and fertility.
Czech Easter celebrations have long included egg painting also known as kraslice, an old pagan emblem that has been converted into a work of art by centuries of steady hands.
The Czech Easter eggs decorating has deep origins in Central European culture, reaching back to ancient times.
It is worth noting that thousands of decades before the birth of Christ, archaeologists in Europe discovered egg-shaped items with intricate decorations. According to folklorists, the pagan spring celebrations often included the decoration of eggs with vibrant colors to represent the rebirth of nature and the bounty of spring following the long, dark winter.
So, it should come as no surprise that the Czech republic Easter eggs, signifying the start of another life, would therefore be included in subsequent religious celebrations of Christ’s resurrection.
How to Make Czech Easter Eggs
As an emblem of rebirth, the egg plays a central role at Easter. Traditional Czech eggs decorating is a common folk custom with a wide range of techniques.
To decorate the Easter eggs, you will need the following:
- Eggs
- Eggs dye
- Beeswax
- Paper towels
- A spoon
- A Cotton cloth
Procedure:
Step 1: Apply the lighter base coat of dye.
An egg serves as a symbolic beginning. If the color is desirable, then skip the base coat of dye and jump right into the painting phase. As we’ll be working our way from lightest to darkest, yellow or white seems like an excellent place to begin.
Step 2: Apply Wax to protect the egg surfaces
Wax is used to protect egg surfaces that shouldn’t be painted over. A prolonged drop will serve as our foundational form, and it provides us with a great deal of flexibility. Daisies, the easiest of flowers, and braids, which divide the Easter egg into smaller portions, are two of the most common designs.
Step 3: Place the egg on to the next color
When you’re satisfied with the pattern, place the Easter egg on a big spoon and move on to the next color. Only skip forward to blue if you’re confident; we’re working from the lightest color to the darkest.
Step 4: Consider all the designs you may want
While waiting, you can either proceed to the next Easter egg or take a break to consider how well the pattern will evolve. Think about all the designs and ornaments you’d like to see included, from plants and flowers to geometric patterns and a helpful remark or a few animals.
Step 5: Gently dry the egg
Every now and again, take a peek at your egg to see if the color is where you want it to be. At the appropriate time, remove the egg from its storage and gently dry it with preferably a paper towel.
Step 6: Determine whether you will add another color
Go through your finished product and determine whether you want to stop here or add another color.
Step 7: Consider the arrangement of colors.
Allow the egg to sit inside the darkest dye — often blue — after you’re done adding features in the second color. When the egg has reached the right color, remove it from the dye and dry it off with a clean paper towel.
Step 8 : Get rid of the beeswax
After the Easter egg is totally dry, you can eliminate the wax. In any case, we have completed our creative process! The simplest solution is to reuse the candle that we used to make the decorations.
Put the egg in front of the fire long enough for the beeswax to melt, and afterward, wipe it clean with a clean cotton cloth. Though time-consuming, the outcome will be well worth the effort.
You now have a kraslice; congratulations!
Learn to Cook Traditional Czech Meals in Prague
Join a 3-hour cooking class in Prague and learn to make traditional Czech dishes such as goulash, dumplings, and apple strudel. You will also visit a farmer’s market to see local ingredients and learn about Czech cuisine.
Highlights
- Learn to make traditional Czech dishes such as goulash, dumplings, and apple strudel
- Visit a farmer’s market to see fresh, local ingredients
- See and taste typical Czech ingredients
- Prepare a 3-course meal to savor over lunch
Included
- Cooking ingredients
- Recipes that you can take with you after the course
- Kitchen utensils and equipment
- Use of aprons
- 3-course menu prepared by you
- Market visit
Get Prague Easter Eggs as A Souvenir
A box of colorful, hand-painted Prague Easter eggs is a great souvenir to bring home from various Prague Easter marketplaces and stores that stock Traditional Czech Easter food and painted eggs all year long.
Traditional Czech easter eggs were a universally celebrated symbol of love, brotherhood, and hope for a fresh start in communist Czechoslovakia. Today, friends give each other eggs with the message “Christ is risen” written on the front around Easter time. To which the response is, “Christ is risen truly.”